Administration Interface
This section of our documentation is dedicated to the detailed exploration of the user interface of Neos. This is composed of different panels and subpages. Each of these panels is responsible for specific tasks. In the center of the user interface you will find the heart of the system - the preview of your website.
As the name implies, log in here with your Neos username and password.
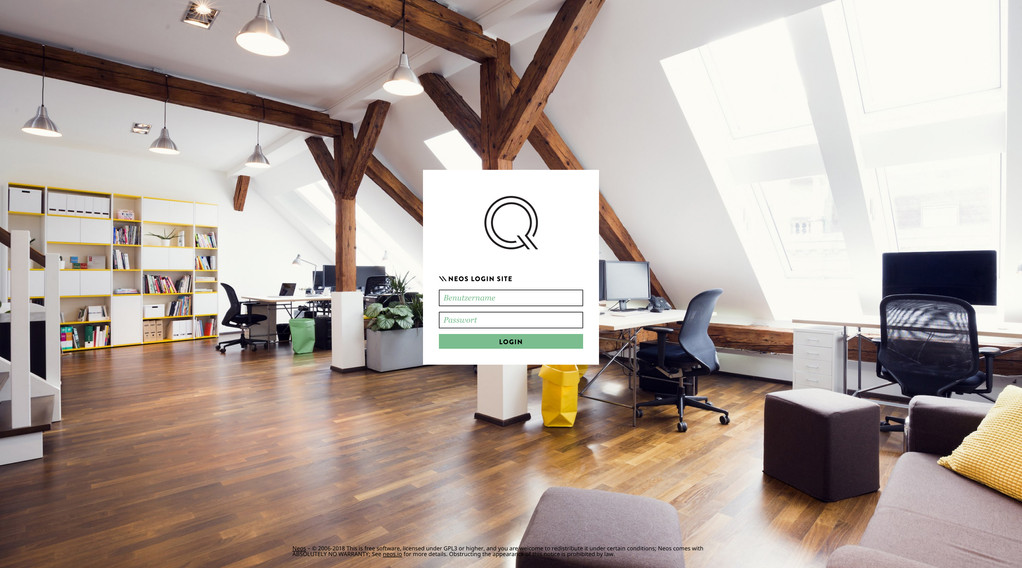
The login page
After logging in, you will be taken to the default view (edit view), the part of Neos where you will mainly be.
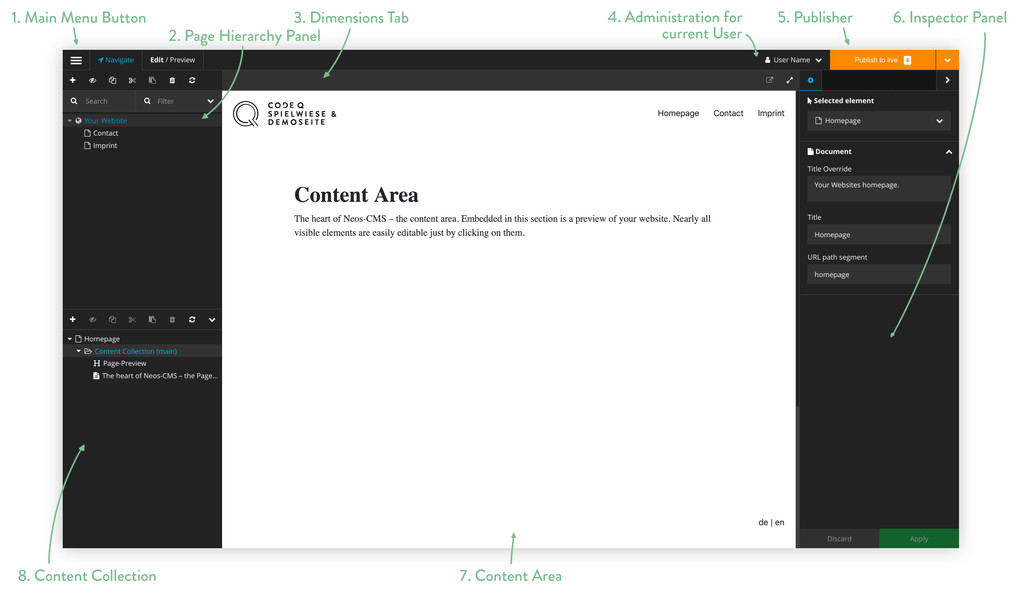
Overview of the default view
-
The Main Menu Button opens to main menu. Use the main menu to navigate to almost all features of Neos.
-
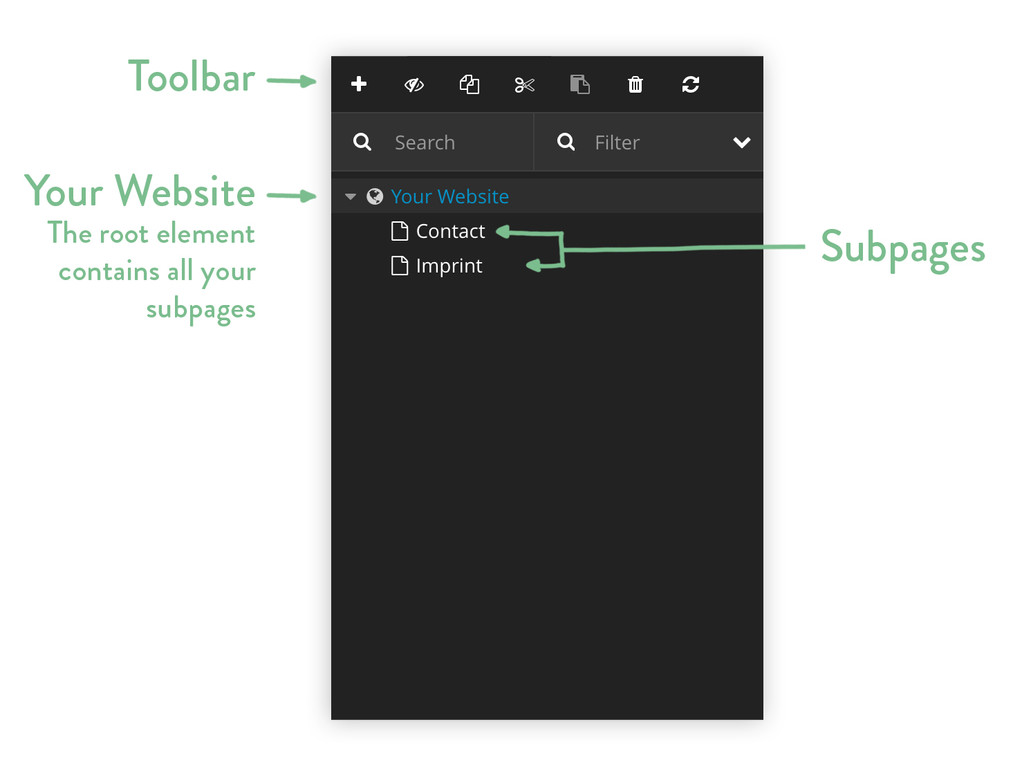
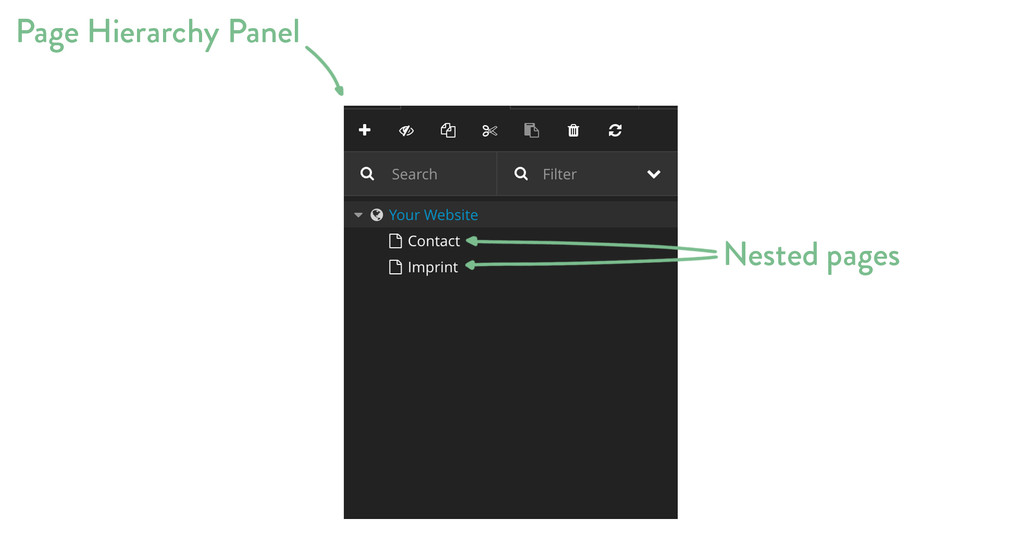
In the Page Tree Panel you will find the page tree of your web pages. In lists all pages of your website.
-
The Dimensions Tab is usually used to switch between different language versions of your website.
-
The User Management button takes you to your user profile. Here you can log out of Neos or manage your user data.
-
The Publisher is responsible for publishing your website. Before you use the publisher, any changes you have made are only visible to you. This means that you can experiment with no worries and mistakes are only visible to you for the time being.
-
The Inspector Panel allows many settings to be made on individual elements such as pages, texts or images.
-
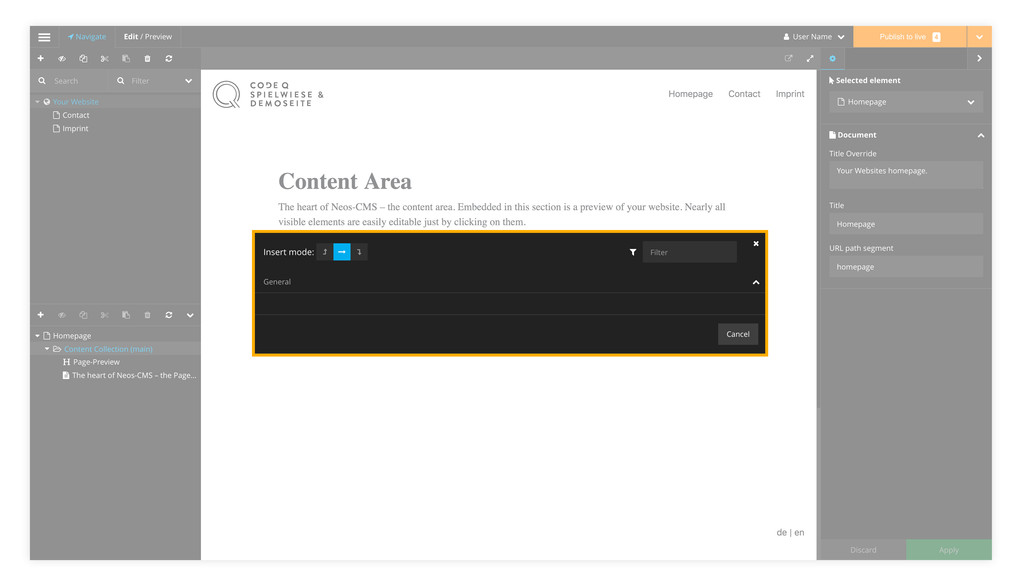
The Content Area - the heart of Neos. In this section you will see the real-time preview of your website, which you will be editing directly. Simply select by mouse and you can rewrite, move, delete or change the selected element.
-
In the Structure Tree Panel you will edit or create elements. Here are the content collection(s) - all the elements of the current pages.
The Main Menu Button takes you to the main menu. This is shown on the left side of the user interface. The main menu allows you to navigate to almost all features of Neos.

The open main menu
The page tree panel is located on the left side at the top of the UI. In the page tree panel you will find the page tree. Using the page tree, you can navigate to and edit all pages of your webpage. The topmost element in the page tree is always your website. This then contains all other subpages.

The Page Tree Panel with the page tree and all existing pages
The Page Tree Panel with explanations of the individual elements
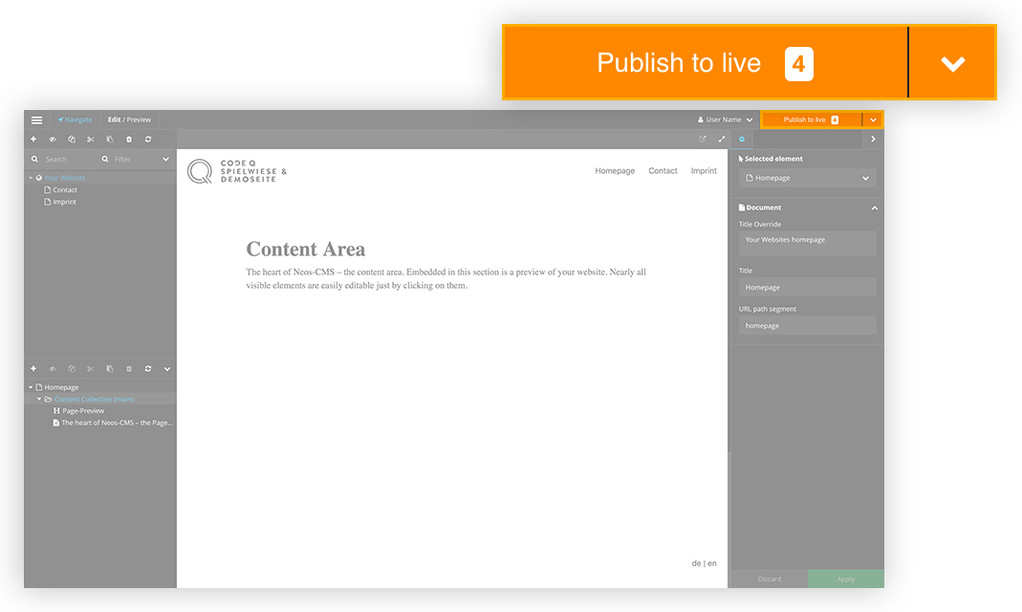
The publisher is on the right side at the top of the user interface. Your quasi-protection against mistakes - the publisher. The publisher protects your against mistakes, because unless you make a conscious effort to publish all the changes made by clicking the publish button, no one else sees them except yourself.
The Publisher
Note about the Publisher
When you make changes to your page, the publisher displays the text »Publish - live« and a number next to it. The text means something like "Publish the changes to the live area". The number indicates the number of changes made on the current page.
The following small finesses should be considered about the publisher:
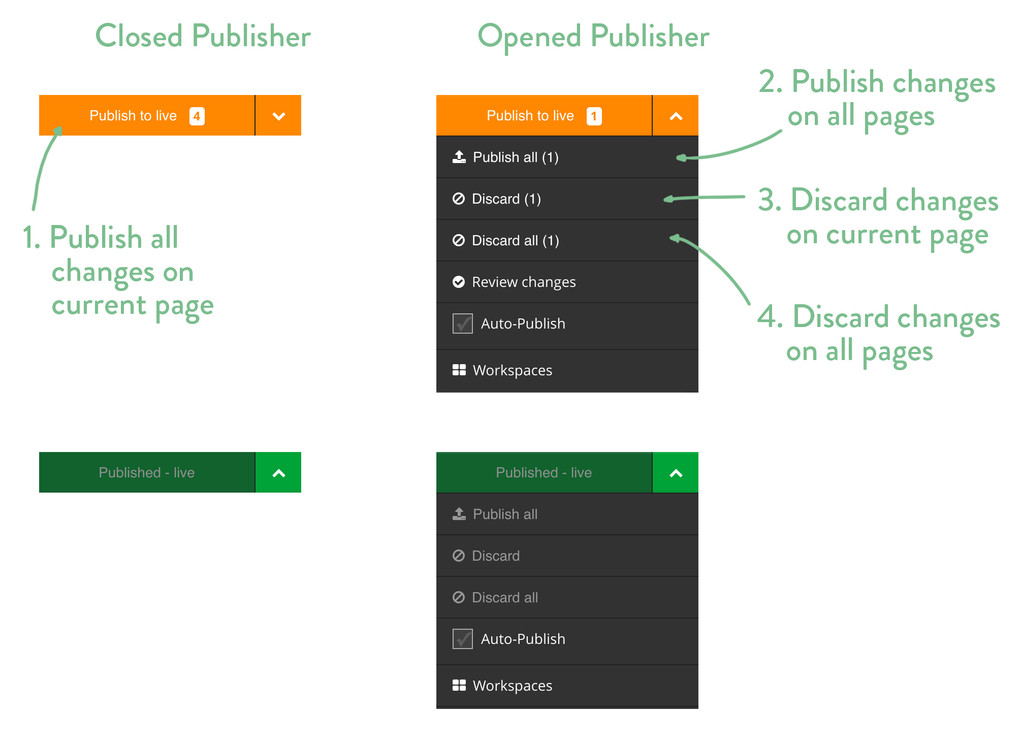
Explantation of the the Publisher in various states
-
If you click on the publisher button (not on the little arrow), you'll immediately publish any changes on the current page.
-
When you open the publisher (by clicking on the arrow), you can publish all changes made to all pages.
-
If you click »Discard« in the open Publisher, you only discard the changes on the current page, not on other pages.
-
If you click »Discard all« in the open Publisher, you discard all changes on all pages.
The Inspector Panel is located on the right side of the user interface. The Inspector will make adjustments to the currently selected item. This can be a page, but also smaller elements like text or pictures. Depending on the item selected, there are a variety of possible settings that can be made via the inspector.
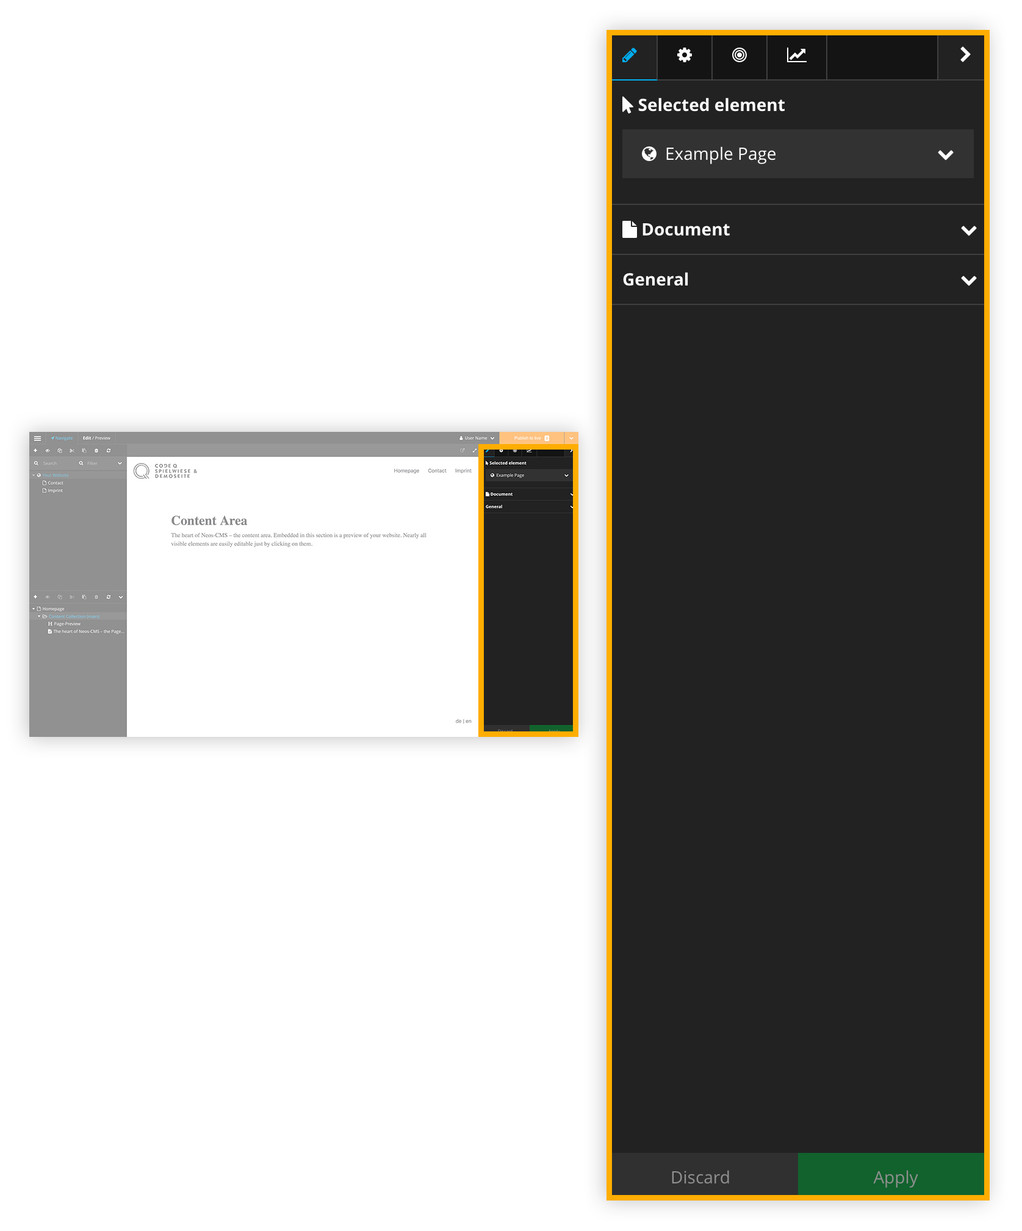
The Inspector Panel
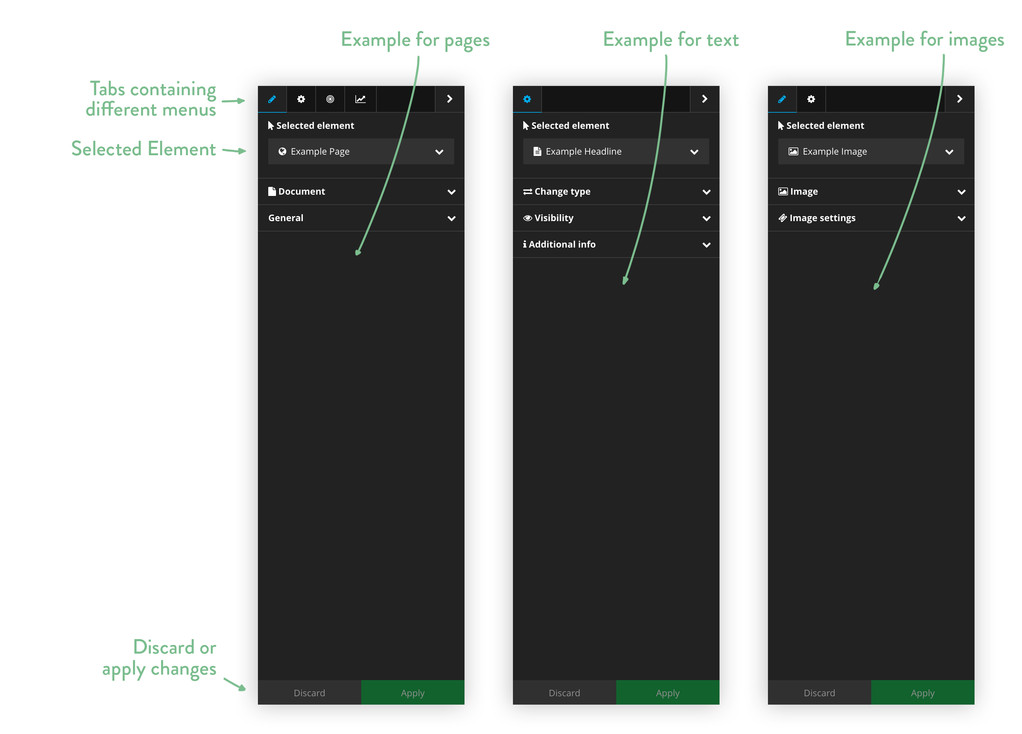
The inspector with different selected elements
The Content Area is located in the middle of the user interface and forms the core of Neos. In this section you can see the real-time preview of your website, which can be edited directly. This means that you can simply select an element by a mouse click and then edit it directly. The page preview will be the area to which you pay the most attention in Neos.
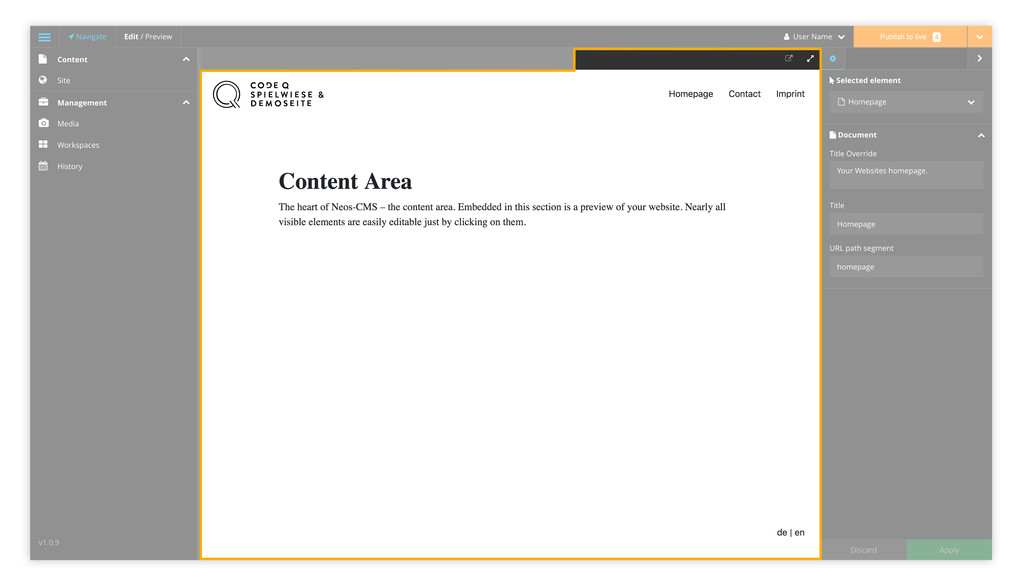
The Content Area - the heart of the Neos content management system
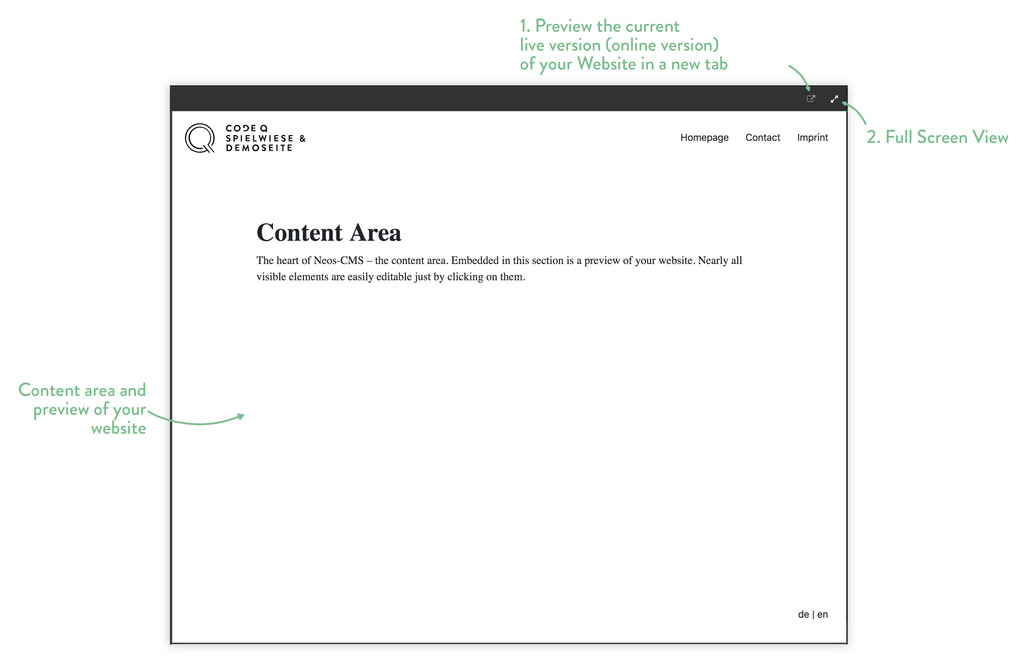
Explanation of the elements of the Content Area
-
Click on »Open page in new tab« to open a new tab with your page. In this tab, your page is no longer displayed in Neos, but in a normal environment with the current lvie data - just as you a user on the Internet would view it. Please note that only the version of the page that is actually published is displayed here! The changes that you have not yet published are not visible.
-
Use the »Full Screen« button to see your current content in a distraction free mode.
The Structure Tree Panel is on the left side at the bottom of the user interface. In the tree view, you'll find the content collection(s) - all the elements of your current page. In the content collection you can navigate to your desired elements, create new elements or edit existing elements.
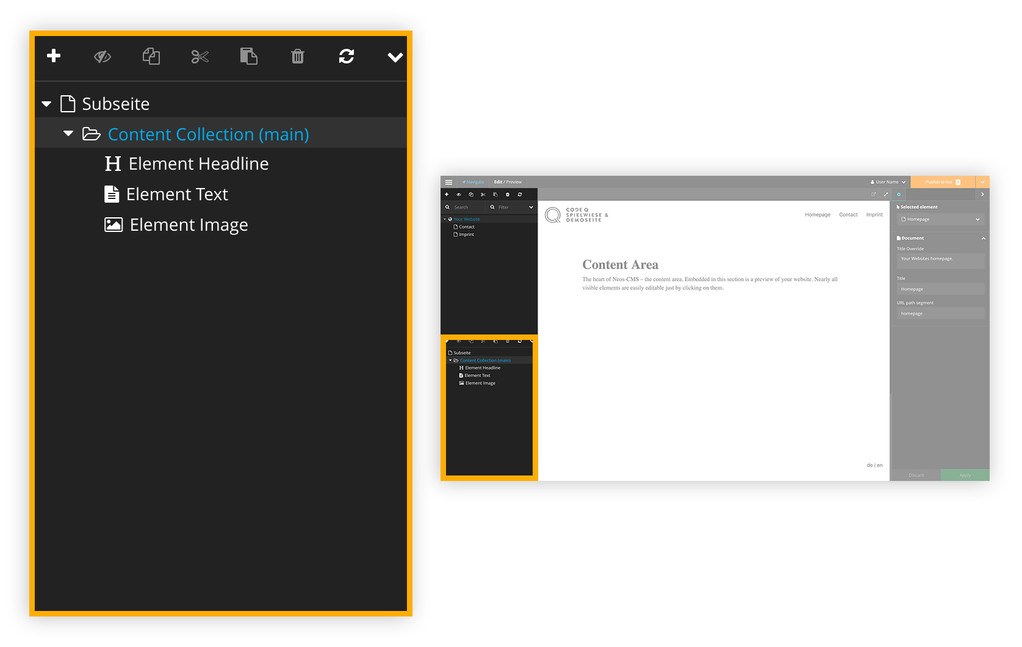
The Structure Tree Panel
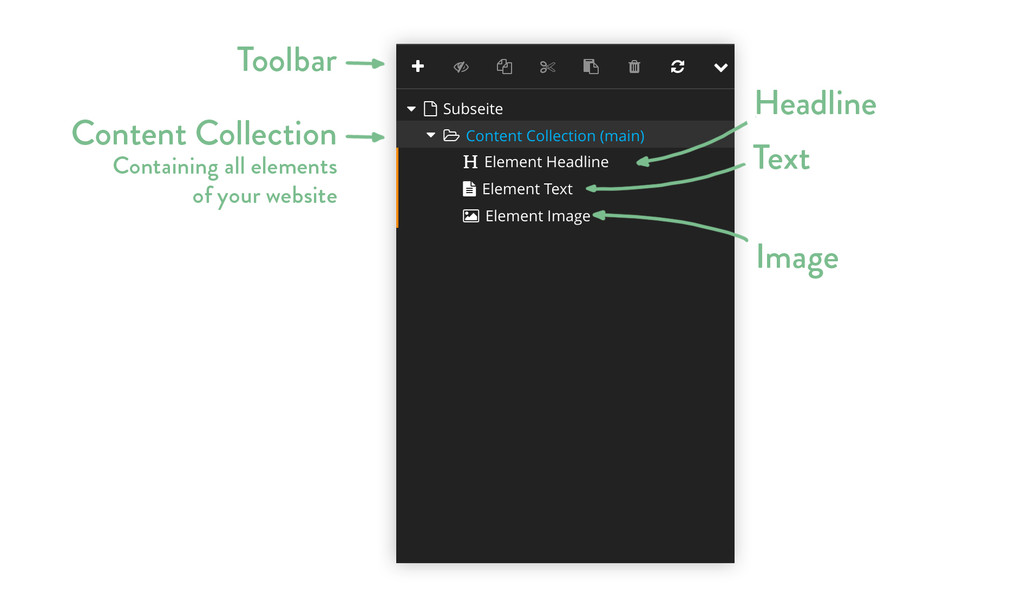
Example elements in the Structure Tree Panel
To get to the media collection, navigate to the menu »Media« via the main menu. The media collection is the collection of all the media you use on your website. That meant you could find, edit, and categorize any photo, movie, or audio file you've ever uploaded to your website.
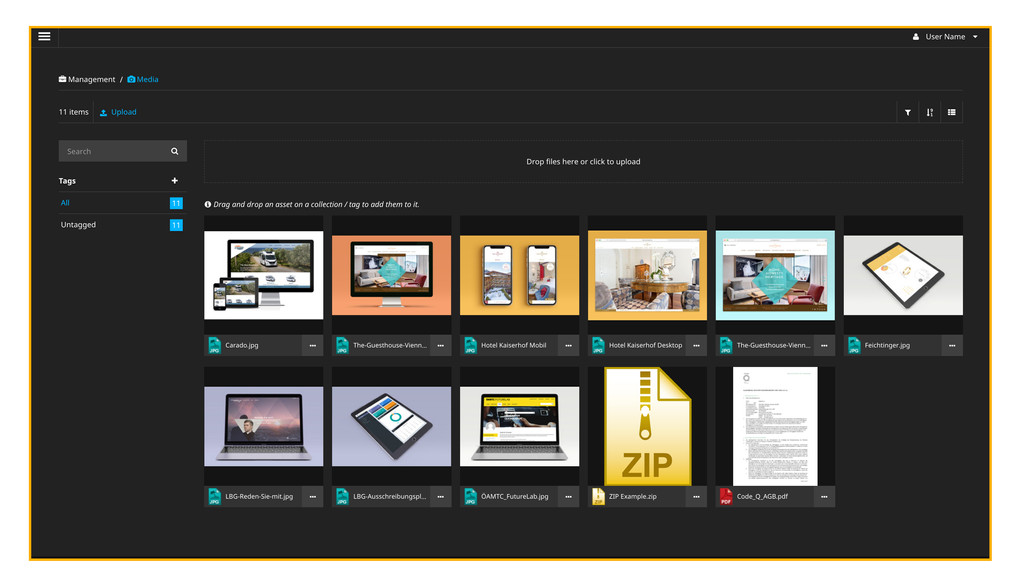
The Media Browser
The Insert Element Window appears whenever you create content elements or pages. Depending on your current focused element different elements are available in the insert window.
The Insert Element Window
Neos saves all pages (in the page tree) as well as content elements (in the structure tree) in nested lists.
Here's an example:
Example of a page structure
You will see that the pages »Subseite« und »Kontakt« are in a list, inside the list with the entry "Home". Neos allows any number of nestings of your content.
If you create a new page, you can choose in insert mode whether this page should be created above the »Subseite«, nested within the page, or below the page. You have the same options when copying pages, and of course with all content elements.
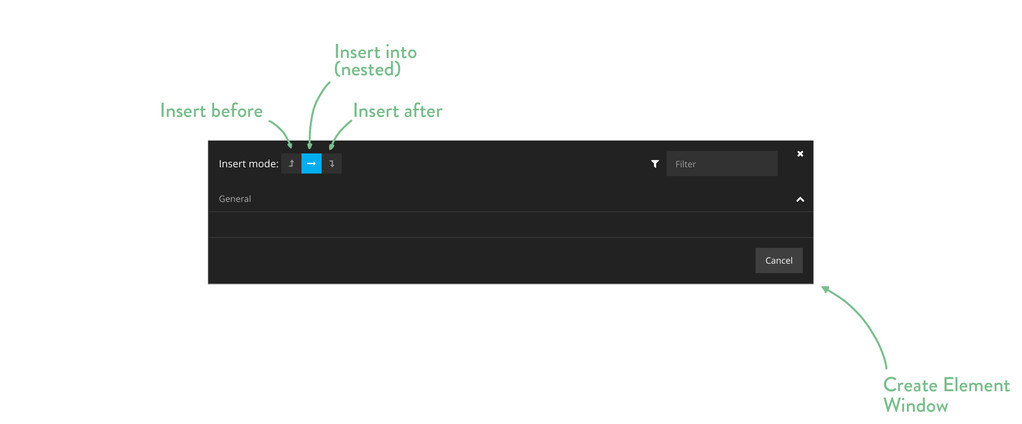
The insert-mode of a Insert Element Window